For more details about these two projects, join me at www.theeverydayscrapbooker.wordpress.com! Hope to see you there!
|
For more details about these two projects, join me at www.theeverydayscrapbooker.wordpress.com! Hope to see you there!
0 Comments
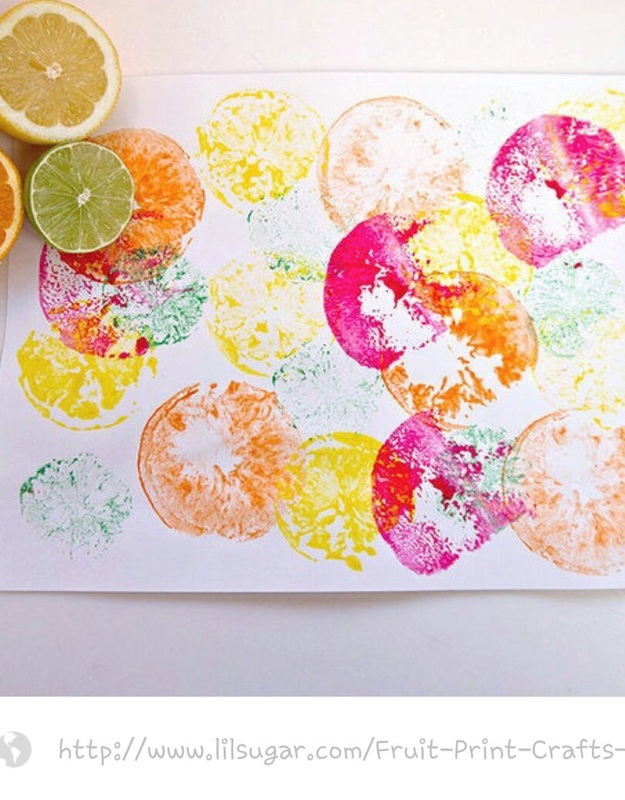
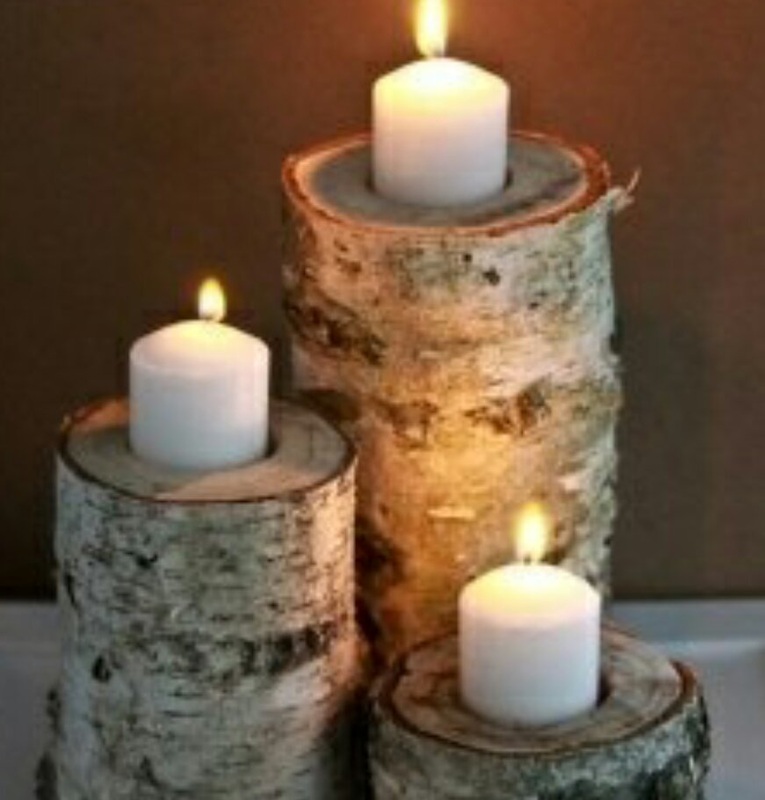
Summer is now upon us- what are we to do? In between vacations, summer camps and boredom busters, keep crafts and crafting at the top of your downtime list. Staying crafty doesn't necessarily mean pulling out the knitting needles or sewing machines. Do something different- try taking a hammer and nail to a tin can for a sweet summer nighttime candle; use those sea shells you collected on your family vacation in a beautiful way to add some fresh decor to your home (I've got an ice cream pail filled with sea shells that were saved from family vacations growing up. I'm definitely using some of them in this way); maybe you'll discover some new toddler crafts or family games to play on your next vacation or camping trip. You are smart! Think outside the box and come up with something new! If you're stuck in a rut, maybe some of the crafts I found will help jump start your creativity. Whatever the case, read on. Maybe you'll find something new and fun to try! 
I should just mention here, that these are DIY candles. Collect wine corks and soak them in acetone, then put them inside a votive candle holders and light. Voila! 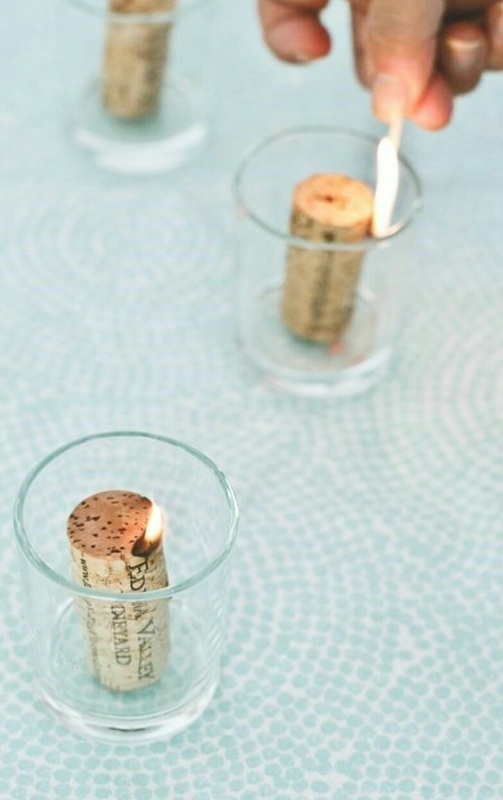

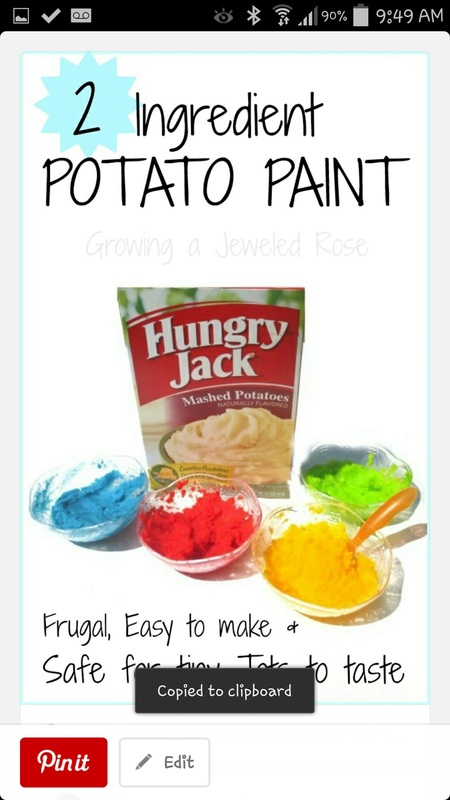
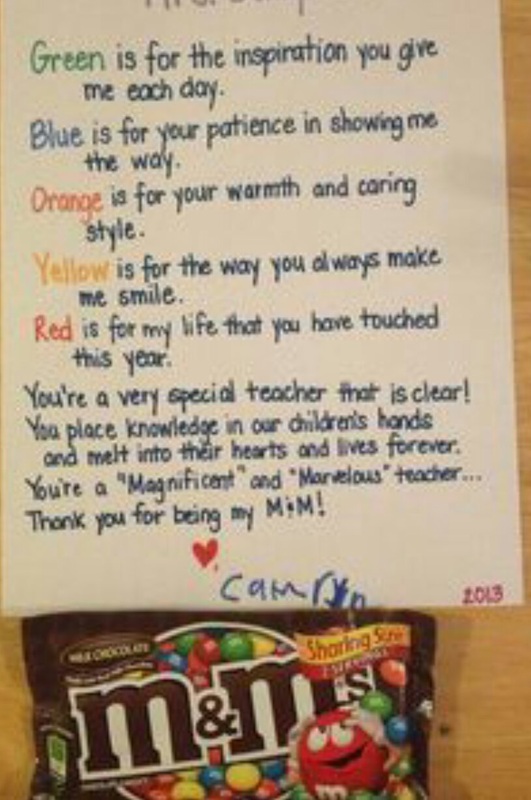
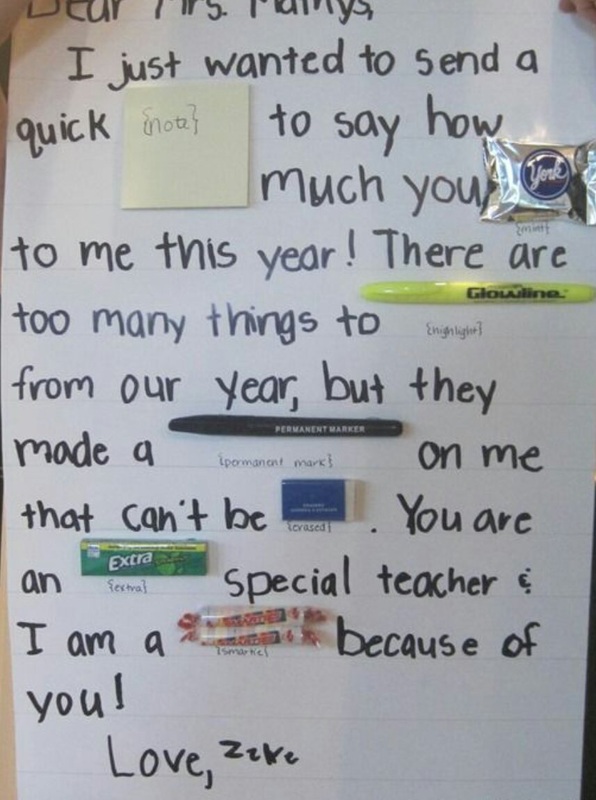
The end of the school year is upon us. Where has the past year gone?! If it just hit you like a ton of bricks- like it just did me- you're probably frantically browsing Pinterest and Google for quick and simple (and CHEAP!) end of year teacher appreciation gifts. I may or may not have just done the same thing! Some kids aren't done school until the end of the month; others, like my kids, are finished for the year on Thursday. Eep! I have one day left to get something whipped up! For those of you that have a little more time- and for those lacking inspiration, here's some ideas you may not have come across (or thought of): 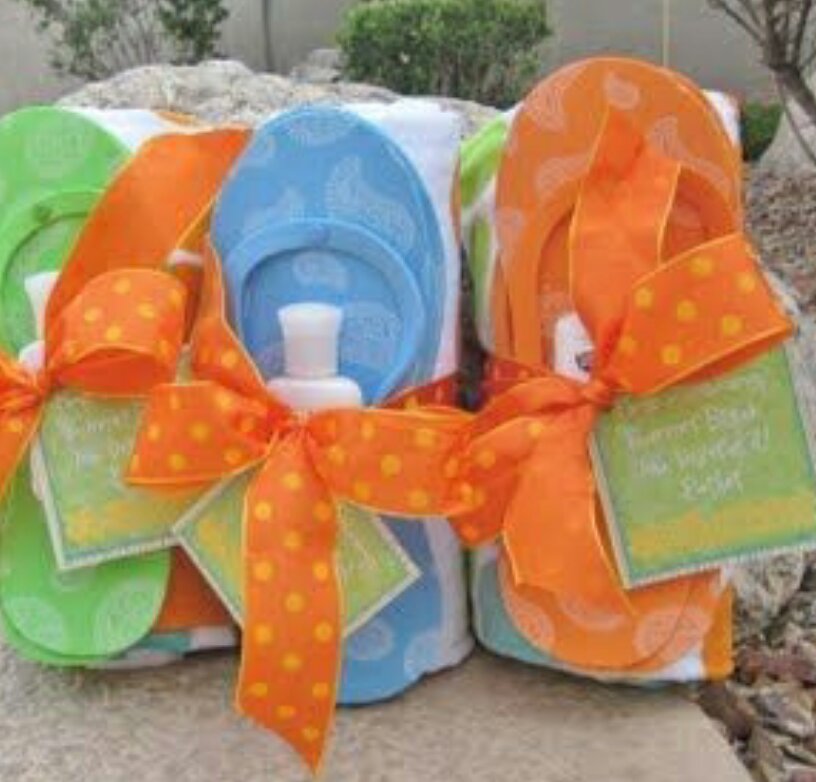

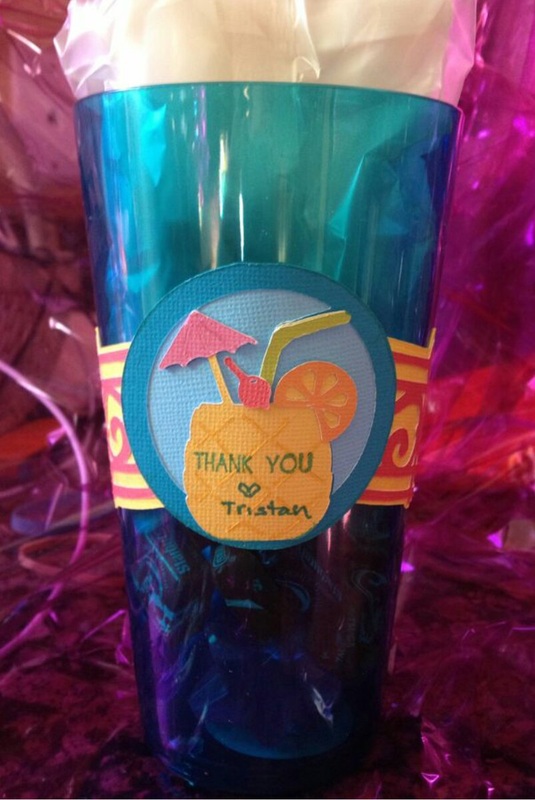
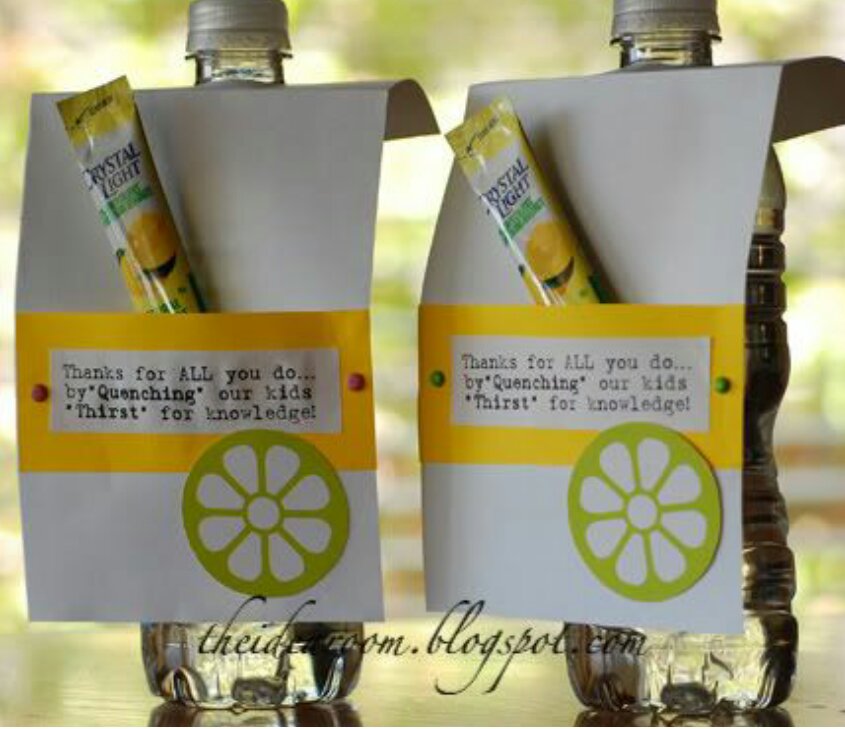
I love all of these ideas! They're creative, economical and thoughtful- the perfect combination. Which is your favourite?
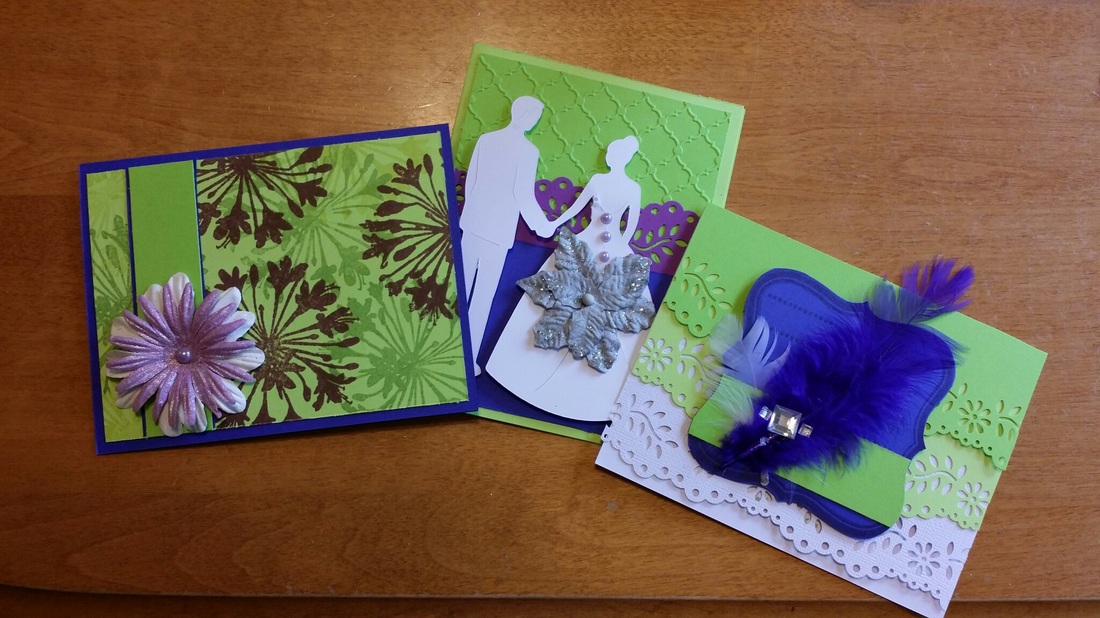
So, how about some pictures of the wedding invitations that's had me stressed out over the last week?! LOL I've never had an order that was so vague and peculiar! My customer asked for The Princess and the Frog themed invitations- thankfully that didn't mean stamps or stickers of actual frogs! Ha! Instead, I stuck with a floral and vintage theme, playing up Tiana's wardrobe in the scenes with the villain (forgive me for forgetting his name). And, if you're wondering, I was thinking flapper girl- feathers, fringes and sparkle. My customer asked specifically for green and purple. 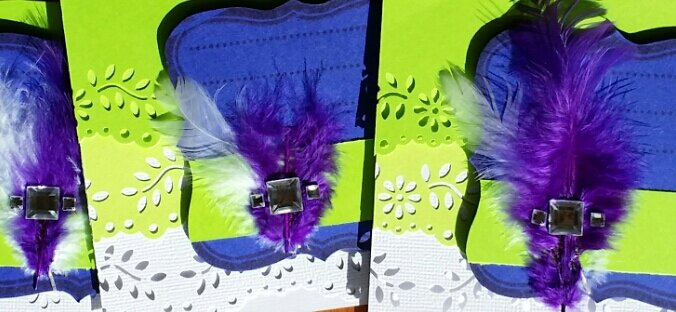
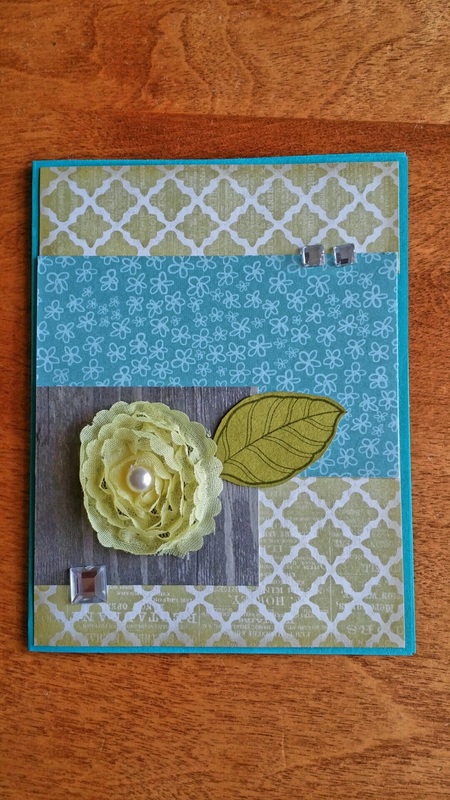
I wanted to play up portions of flapper girl apparel- the headband and fringed dresses. I don't have fringe scissors, so improvised, using a floral punch, creating an ombre type of "fringe"- basically just layers of punched borders. I used the square in the centre of the card as a tool to anchor the feathers, and nothing more. Yes, it adds visually, by lending more weight; it also prevents the feathers from seeming as though they are just floating in outer space. Lastly, the square rhinestones added just a bit more bling and sparkle to tie a 1920's lady's wardrobe together (for a night on the town). 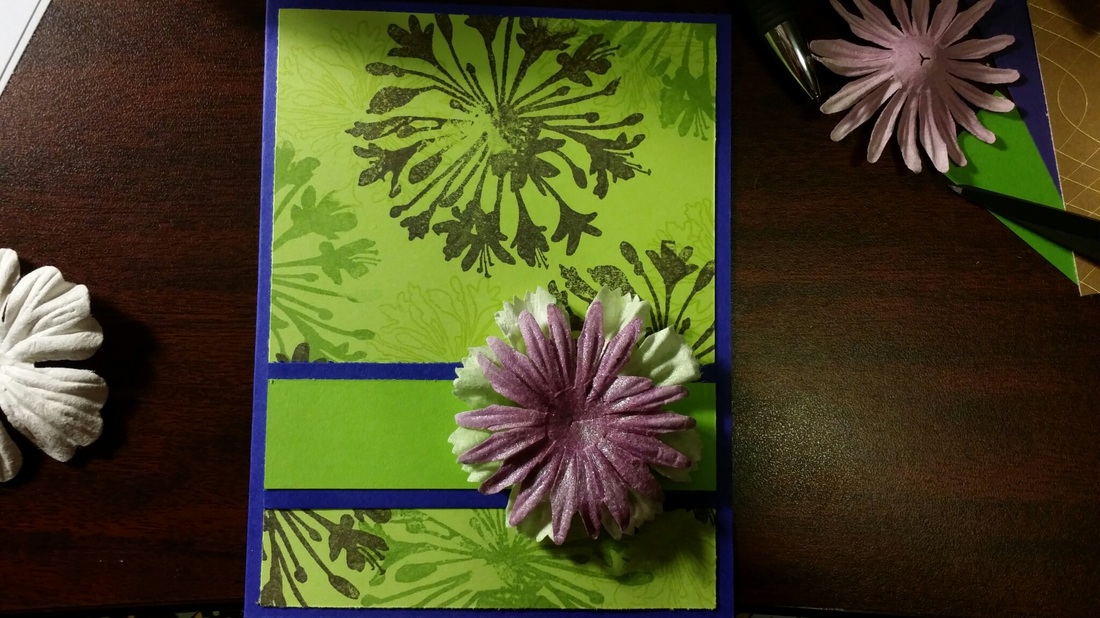
These cards are hand stamped with a stampendous floral stamp, in Close to my Hearts' Smoked Plum ink, and Dew Drops in two different shades of green. Stamping using the lightest color, then moving to the darkest, creates depth by creating layers. The lightest winds up being part of the background, while the darkest becomes the foreground. It's one of my most favourite techniques to use, though it can be time consuming for larger projects. This card is slightly incomplete; the final finishing touch will be a tiny rhinestone or brad gracing the center of the paper flowers (which, by the way, are sprayed with perfect pearls spray ink in pearl)- to add a bit of glitter and shine. 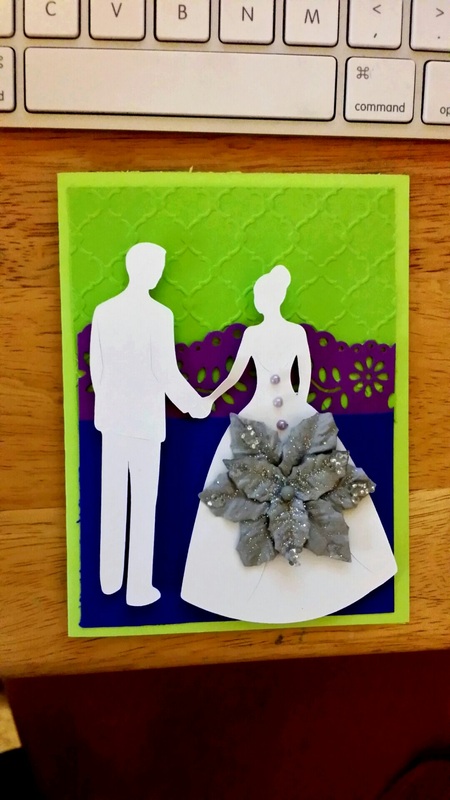
This third of the invitations were specifically requested by my customer. She asked for a bride and groom and she wanted the bride spiffed up a bit. Originally, she asked for something shiny, but as things sometimes work out, it just didn't really jive. It evolved into a silver poinsettia gracing the back of each brides gown and a couple purple pearl rhinestones to mimic buttons on the back of the bodice. I think it's quite darling! 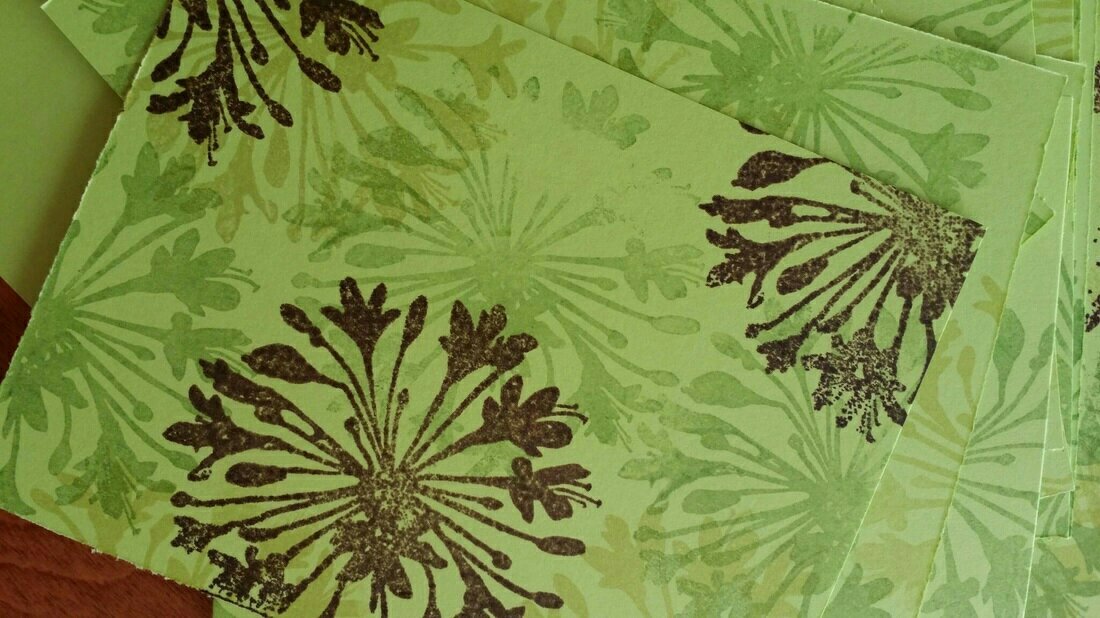
Have you ever wondered if there's a right or a wrong way to stamp? I mean, its fairly easy, right? Just load up your stamp with ink, press it onto the paper, and Voila! You've got a stamped image! At least, that's the mindset I had ever since I started stamping. Right? Its the easiest thing in the world! How many would agree with me? You might actually be doing it wrong. What??! There is a little more to just pressing a stamp into ink, then pressing it onto a piece of paper. There is actually some science (if you want to call it that) behind it. And, it might actually work better than the method mentioned above. By reading crafting magazines (specifically scrapbooking), I've learned a thing or two about stamping. Canadian Scrapbooker magazine is particularly helpful; each issue has a section devoted specifically to stamping and different methods and techniques. Cathy Allen is amazing- she makes incredible art using different stamping techniques. You'd never guess her work is 100% stamped! As I already mentioned, there's more to stamping than just inking it, getting it straight, and pressing it onto paper. Like what? Well, it helps to flip your stamp over and press the ink to the stamp, to ensure a thicker and more even ink application to your stamp; instead of rocking the stamp back and forth a bit when you've pressed it to the paper, press straight down and lift straight back up. That eliminates the "halo" effect once your image is stamped. And lastly, there are tools out there to help keep your images straight, regardless of using acrylic or wood mounted stamps. Stamping is pretty easy. But, if your plan is to attempt creating an image that's crisp, clear and flawless, try these steps. Your image may not always turn out perfect; if not, roll with it! For example, while working on these pillow boxes, the image I wanted to stamp didn't come out as nicely as I would have liked it. Originally. Then I thought, 'why not go with a more vintage look, instead'? So, I inked the edges, and made it seem as though I had intentionally stamped that way. Is that the look you're going for? There's a technique for that! (But, that'll be another blog post!!) Pressure- and even amounts of it- is important. Which is why it actually turns out to be easier to flip your stamp upside down, and use the ink pad to ink your stamp, rather than pressing the stamp into the ink pad. I find its especially helpful when you've got a large stamp that you want inked. You might find a brayer makes inking large stamps easier. That naturally leads us to how to correctly stamp an image. After you've inked your stamp, flip it to the correct side and press the stamp straight down onto the piece of paper. Don't rock the stamp back and forth; it'll create a "halo"- basically the ink that's gathered along the edges of the stamp being transferred to the paper along with your stamped image. If that's the look you're going for- congrats! You achieved it! (Such as using the technique I vaguely mentioned above). If not, you'll curb the natural impulse to rock that stamp. Lift straight up once you've finished stamping the image, and you should have a perfect image left on that paper! Cut it out, colour it or ink the edges- do whatever you want once your image is stamped. What happens when you've stamped your image but you're not happy with it? Say its crooked. Feel defeated? A little deflated? I know, it happens way too easily and sometimes way too often. Have no fear- there are tools out there to help you stamp a straight image- without fail- every single time! If you're an acrylic stamp user, you may find using stamping blocks with grid lines painted on them useful. Use the grid lines as guides to help keep your images straight. Generally, I try to line up the lines on the stamping block with the bottom and side edges of the paper I'm stamping on. More often than not, I cut the image out once its stamped. I hate fussy cutting but can't seem to get away from it. I do it every. single. time! It isn't always stamped perfectly straight, but its close enough that no one will notice it. I like using them, but I would like to try a stamping system such as Cathie Allens' Position-it tool. It's basically an L-shaped tool that helps keep your images straight. They are especially useful for wood mounted stampers, since its virtually impossible to see where you're stamping your image. From what I gather, line up your stamp with the guides, and stamp. You'll have a perfect image every time. I have not tried one, and the only place I know of that sells them is Canadian Scrapbooker. There might be more, similar items out there, called by different names. But, I would LOVE to try it. I use both acrylic and wood mounted stamps. I find they are equal- one isn't more superior than another. I like acrylic slightly better as its possible to see where your stamped image will be on the paper. Did you know there's etiquette involved with stamping? What techniques do you find most useful to achieve clear and crisp stamped images? And lastly, will this change the way you currently stamp? It was good food for thought for me. Maybe it will be for you, too! 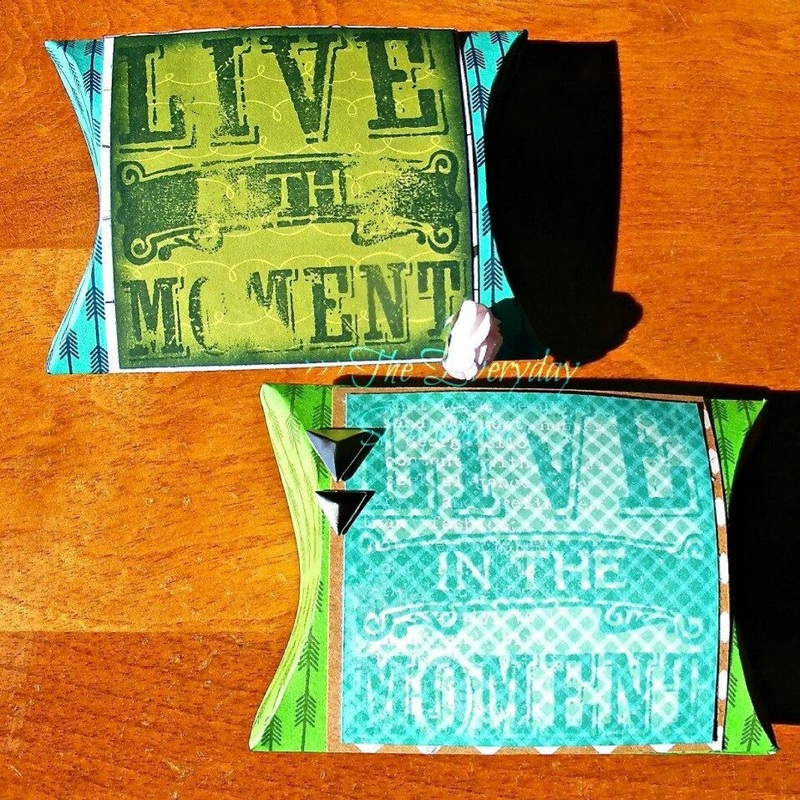
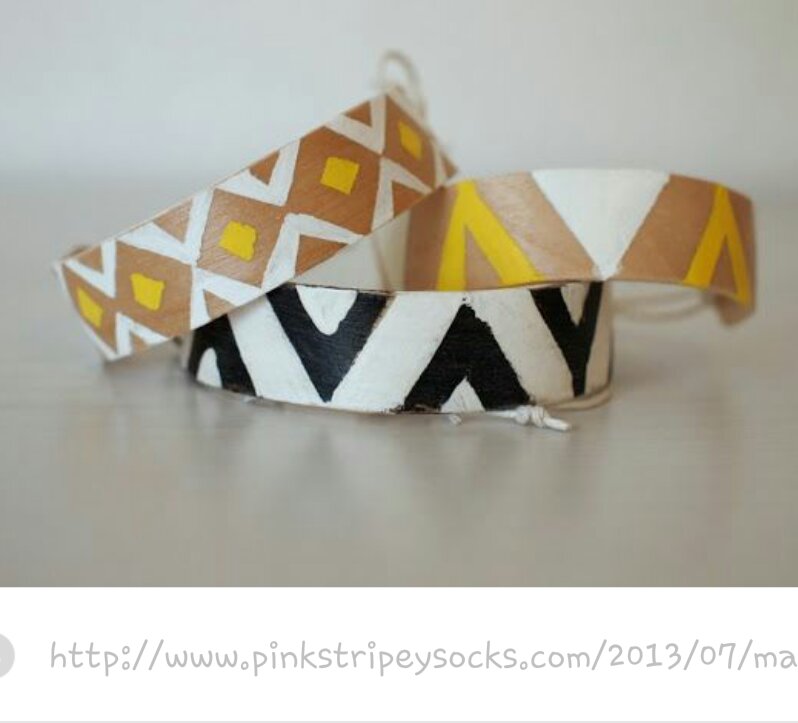
It must be serendipity. It never fails- nearly every time I'm on Pinterest drooling over all the DIY, colors, crafts, food, clothes ideas, etc., projects using washi tape always, ALWAYS grabs my attention. Serendipity. So, why not share, in blog form, some of the washi goodness that keeps reeling me back in, making me love it more and more, picture by picture, DIY project by DIY project. Yes?! There are seriously a ton of uses for Washi tape- the only limitation is your imagination. Seriously. You've seen me post a few uses for washi to my Facebook page already- wrapping your iPhone cords, and covering thumb tacks. Pretty ingenious, in my opinion. But, have you ever thought about sprucing up your bicycle or ceiling fan with washi? Why not spruce up those boring brown band aids with a strip of washi?? Use different, brightly colored strips of washi in your day planner to highlight important or specific meetings, occasions and events. Smart, right?! And, there are LOADS more ideas out there! Your imagination really IS your only limitation! 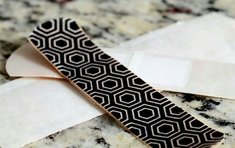 Of course, you can craft with washi. Make a statement in your baby's nursery or in your craft haven by creating some canvas letter art. Jazz up your photo boxes by covering the edges in washi tape or wrap the edges of paper rosettes with washi. And, of course, use it on your handmade cards and scrapbook layouts. 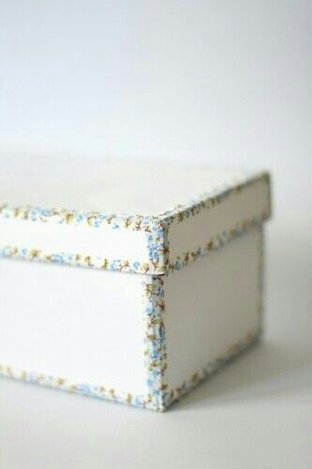 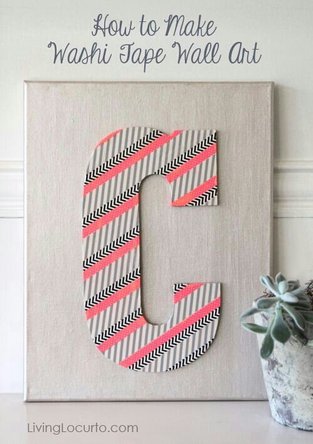 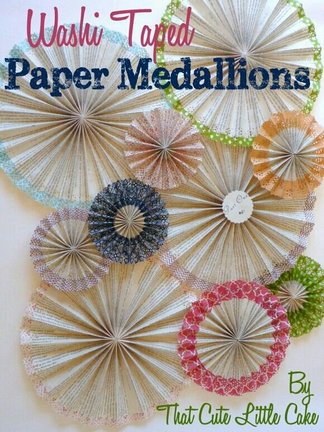 Has it inspired you yet? So, in addition to its multi functionality and prettiness, it's fairly inexpensive! Find it at your local scrapbook store, Walmart and even the Dollar Store!
What's stopping you?! Go and get some! Liquid Glass. Crystal Effect. Ever heard of it? Maybe you've heard of it, but have a very vague idea what it is. Or, you haven't got the slightest idea what it is, or what you are supposed to do with it. Believe it or not, I'm in the same boat as you! Along with my starter kit, is Liquid Glass- this little bottle of cloudy, gluey awesomeness! I looked at it, held it in my hand, and went "hmm", then set it down and continued drooling over the rest of the yummy goodies inside the starter kit. Starter kit for what, you ask? I am Whitecourt's newest Close to My Heart rep! I got an entire box full of delightful goodies to play with and business supplies to start businessing with. This girl is in scrappy nirvana! Before I got my starter kit, I had never heard of Liquid Glass. I had never heard of Crystal Effect, either. I had heard of something else (which eludes me right now), but is essentially the same thing.. What you do with it though, I was clueless. For the most part, I still am! So, the point of this post is to learn- all of us together! So, what does liquid glass look like? How big is the bottle and how does one use it? The first part of this question had already been answered for me, since it was sitting right in front of me. As for using it, I had to turn to my dear friend and upline Jamie for more info. Turning to Jamie started me on this journey to learning what this little miracle's crafty potential is. And, let me tell you, its significant. I'm sure there's A LOT more uses for it than what I'll outline in this little blog post. (It'll just be good incentive to revisit this topic one day in the future!!) There are multiple uses for Liquid Glass, including adhesive, embellishment making and element - enhancing, and I'm fairly certain that's just barely scraping the surface! What do I mean by embellishment making and element-enhancing? I'll explain shortly! 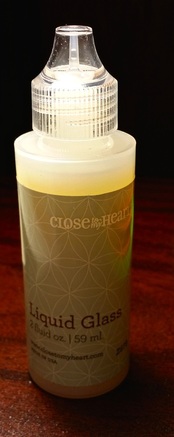
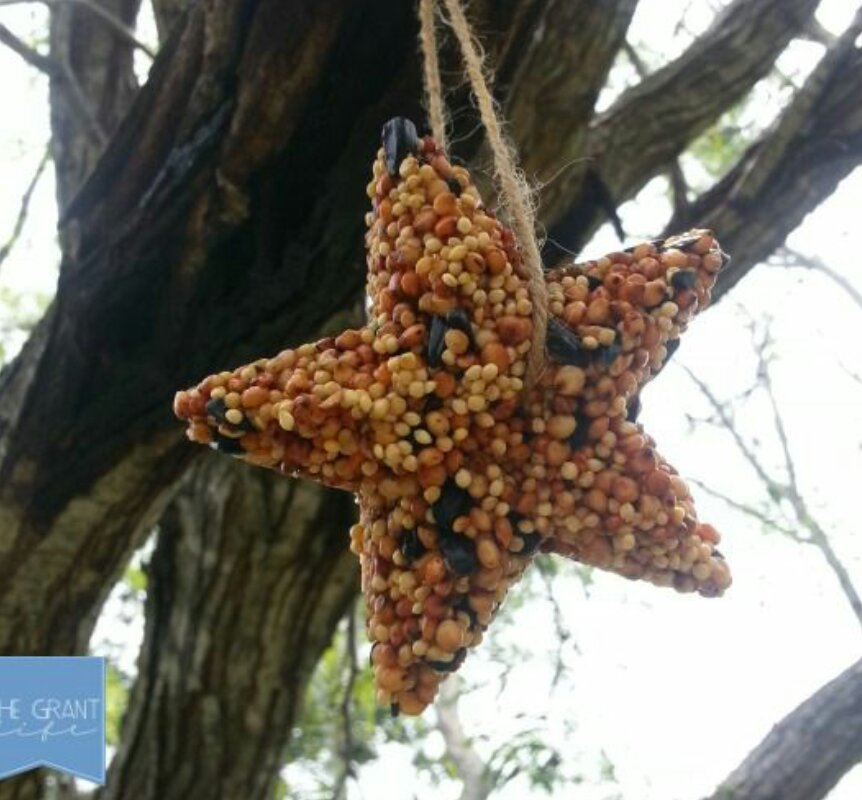
So, what does Liquid Glass look like? This product comes in a 59 mL or 2 fluid oz. bottle with a fine-tip applicator. Liquid Glass is specifically Close to My Hearts' brand of this product; other companies, such as Stampin' Up, call it Crystal Effects (or something entirely different). It just depends on which company you purchase through that will determine the name of the product. It's cloudy looking- much like the glue we used as kids in elementary school (remember those brown, bubble-like bottles with the rubber tips?!) (Please refer to the picture above for a visual example of what Liquid Glass looks like in its bottle). Squeeze a small amount onto whichever surface you're working on (the only ones at the moment I know it works on, is paper and vellum and/or transparencies and certain embellishments such as plastic and possibly metal); and use the tip to spread it around. I find this method works well for fairly small areas; on larger areas that you want completely covered, use a paintbrush. I used a foam tip paint brush to cover (for example) the star in the picture below. 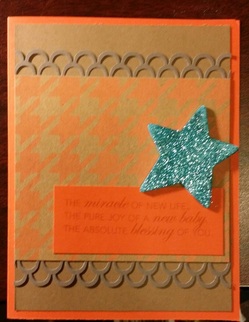
This picture also illustrates Liquid Glass' ability to function as adhesive. On a whim, I added glitter to the star (wood veneer). The glitter STUCK! I left it overnight (which actually turned into a couple of days) to make sure it dried good and well before adhering them to a project I've been working on., and I found that they were actually stuck to my desk. They took some significant prying to get them loosened!. (I just set the star on top of this card for illustrative purposes.) I haven't tried it yet, but Liquid Glass also adheres vellum and transparencies. It dries clear, which makes it ideal to use on these items. Its especially good for adhering particularly heavy items to your projects, such as buttons or large brads. I say 'I've heard' only because I don't have first hand experience with it- yet! I've wanted to create with transparencies for eons! And, now that I know it'll adhere heavy items to projects, I want to try that out, too! I'll let you know how it goes when I finally get the chance!! So, what does embellishment making mean? Think DIY glue dots or enamel dots (sans enamel). Make sure to use wax paper when creating your dots so they're easy to remove after they've dried. Drying can take varying amounts of time, depending on how thick/how much Liquid Glass is used. Add glitter to the dots for some sparkle, or add some Liquid Glass to plain brads in your stash for some extra shine. (The info in this paragraph was found in a few places around the web; making the DIY glue dots was found here; the picture was found via a google search.) 
Spreading Liquid Glass over specific areas of stamped images/embellishments creates a beautiful effect too, enhancing different elements perfectly! For example, In my Vintage Glasses Fathers Day cards, I filled in the 'lenses' of the glasses with Liquid Glass, to give the appearance of actual glass lenses. It also works well to make your stamped images look shiny and a tad bit raised, too, for more of a 3D effect. 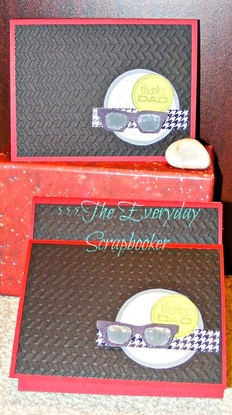
In a nutshell, Liquid Glass can be used in a variety of ways, on a variety of surfaces. Each way it's used creates a unique and stunning effect! It's my new favourite product!!
I know it isn't Wednesday, but I wanted to drop in and share a quick tutorial with you. I asked you on Facebook if you'd like to see a fun way I came across to use up your scraps of paper; judging by the likes, I'd say you do! As I was putting a few together, I decided I didn't care much for the original, so I tweaked it a bit- to my own preferences. You might find you're the same way. That's completely fine, because there's no right or wrong way to do things! The original tutorial can be found here. First of all, I think this is a great idea! There are so many different ways of doing this, the possibilities are endless! Change the size of your paper strips, the size of your photo mat, the direction the strips are arranged in, the colours, the patterns, the designs. All completely customizable. And, I love options! But, there were two things about the original tutorial that I didn't like. First, the amount of adhesive the author used to adhere her paper strips to the mat with. I don't use an adhesive gun (little known fact about me!); I think they use too much adhesive. (Truth is, i've never been able to figure out how to re-fill them when they run out!) Moreover, I actually like to use my adhesive sparingly. Its expensive, and when you're trying to be frugal with your finances and how you spend your money, you find ways to adapt. This is my adaptation. And, it works for me. Secondly, I didn't like how thin the paper strips were trimmed in the original source. Play around with it yourself, and find what you're most comfortable with. I found trimming my scraps to a 0.5 inch width worked best. (The original directs you to trim your strips to 0.25 inches). Different widths are going to give you different looks, so play around with it! 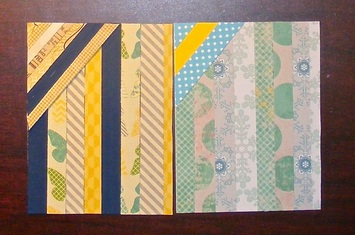
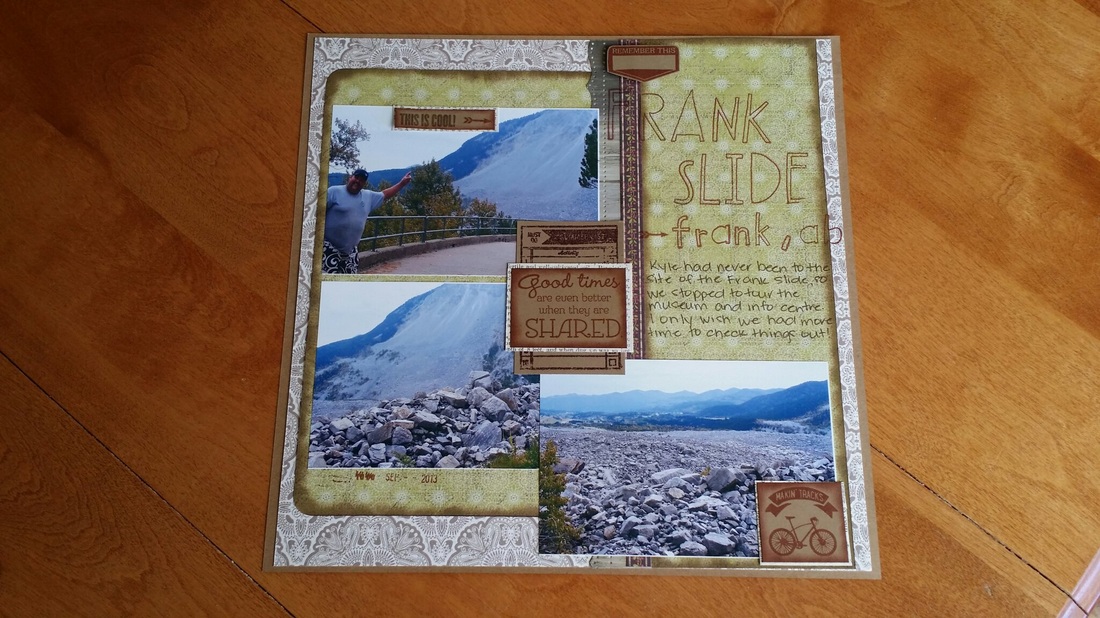
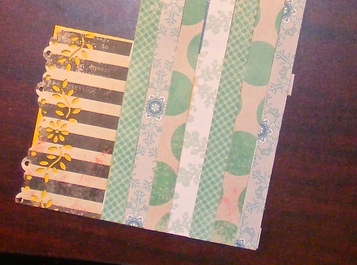
Both photo mats in the picture above were made using 0.5 inch wide paper strips. The mat on the left shows both widths- the diagonal strips are 0.25 inches wide, while the vertical strips are 0.5 inches wide. Big difference, right? So, as I mentioned above, I like to use my adhesive sparingly. The original source calls for the use of your adhesive roller/gun, which spaces the adhesive squares very close together. If its tape, it'll be as long as you allow it to be. I approached this portion of assembly differently. So, here's MY take on this simple and really fun tutorial: 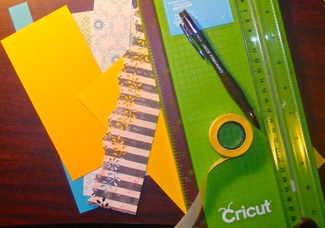
Materials: -paper trimmer -adhesive -scrap paper -scissors Assembly: 1. Trim a large piece of card stock to 4x5.25 inches (or whichever size you prefer). 4x5.25 will work well to mat a regular A2 or 4.25x5.5 greeting card. 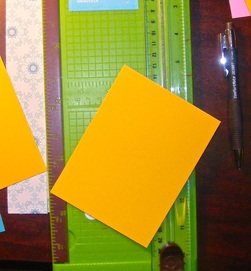
2. Trim your scrap paper to your desired width. I trimmed mine to 0.5 inches. Then arrange them in whatever pattern and direction you like. To adhere, I stuck an adhesive square at each edge of the base mat and in the middle. Then, I added the paper strip on top. Keep repeating until you reach the bottom edge of the base mat. 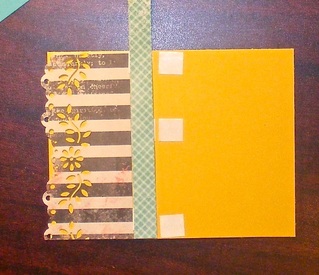
3. Once you have all your paper adhered, trim off the excess. 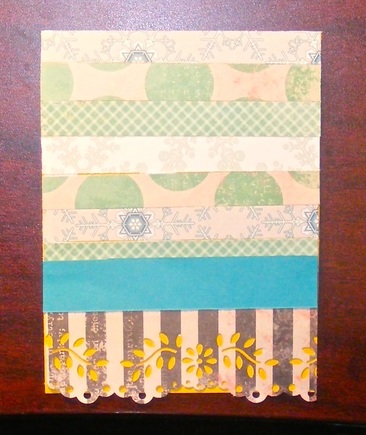
4. Embellish as desired! I hope you enjoyed my little mini tutorial. I might implement this to use up my scraps. Will you?
As a crafter, piles of scraps is inevitable. It's likely a gross understatement, right? As a scrapbooker, I've accumulated so much scraps of paper, it's begun to take over my haven. It's all still useful- the pieces and strips of paper I've kept- but the mountains of it is becoming overwhelming. I'll never possibly use it all up! Feel the same way? Thought about tossing it- or have you done the unthinkable already? Pinterest, the mind numbing, time sucking, gloriously inspiring place on the world wide Web, should really be considered a DIY, self-improvement, all-things-crafty holy grail of all things educational. Maybe that's an exaggeration; maybe it's just a glorified magazine. However you look at it, there are plenty of useful and informative ideas there. I'd love to share a few with you. I scoured Pinterest for some ideas to share with you, since I don't quite know much about using up yarn, fabric and jewelry/beading scraps or leftovers. I posted this question on my Facebook page too, and got some interesting answers! The bottom line is, use your imagination and think outside the box! Here's just a couple ideas in each category, that I came up with. (Just a note, most of the links in the following paragraphs will have tutorials along with them, too! Just follow the links): 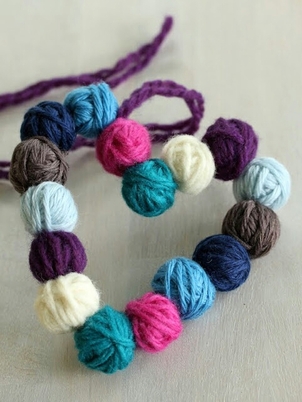
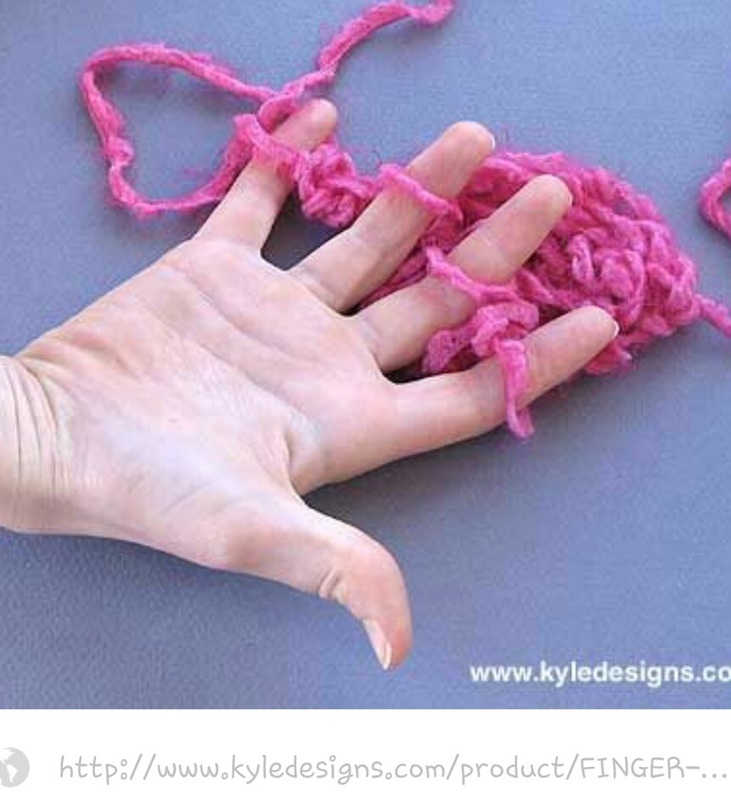
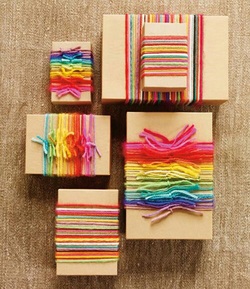 Yarn. Yarn gift wrapping ^^ The picture above is such a neat idea. I think it looks really pretty! Keep it for yourself, or add it to your shop! I'm sure they'd sell like hot cakes. The original link is not in English, so I included the link to another tutorial (that was included at the end of the original sources' blog post) for you to try your hand at! << I found this pin quite some time ago on Pinterest, and saved it because I thought it looked pretty! This would work well with ribbon, embroidery thread and all your yarn scraps! 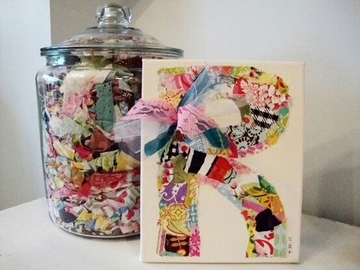
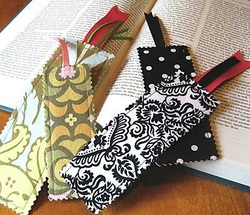 Fabric bookmarks and canvas art ^^ Here's another great item that could easily be added to anyone's shop. Use your left over fabric scraps to create canvas wall art! << If the canvas wall art doesn't strike your fancy, make bookmarks with your leftovers! This would be especially great if you're a bookworm. 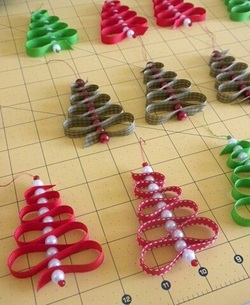 Jewelry/Beads Christmas ornaments and button/bead curtains << So simple and makes great ornaments for your Christmas tree! I know that Christmas and winter is the last thing we want to think about right now, but it is something to remember for when the time comes! The picture below is SO cool! Haven't you ever wanted a bead curtain in your home? I do and I don't. Maybe more when I was growing up it would have been uber cool, but now I'm torn. Its the grown up me fighting with the little kid in me. What are your thoughts? Put this in your kids' room- use beads or buttons! 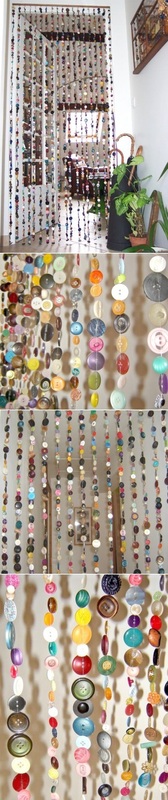
Sometimes, ideas blindside us when we're least expecting it. For example, I've been thinking of ways to promote more sales and business at my booth at craft shows. I'm also currently fighting a losing battle cleaning up my haven, while simultaneously completing my orders. It's a vicious cycle, this clean up-destroy haven ritual. As I was cutting up paper I'd used on projects (throwing out the unusable pieces and salvaging what could still be used - within reason)- the proverbial light bulb came on. 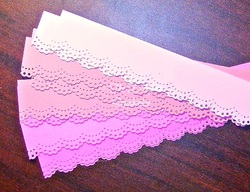 And my specialty, paper! I have so much more paper than you would ever expect, and getting it used up/sold is a really attractive idea to me! I do use it wherever and whenever I can, but it still seems to pile up more quickly than I can get it gone. Can anyone relate? All those strips of paper (usually about 3-4 inches wide and either 4 or 11 inches long) COULD be useful right away, and they COULD be sold- to the right people. Some of my fans are scrapbookers themselves. And, we all know there is no such thing as enough or too much items in our stash. Those words dont even exist in our vocabularies. So, why not make and sell scrapbook and card making borders, packs of paper and embellishments?! All handmade, of course. Problem solved! (To borrow a quote from Peg Plus Cat. Any Tree house watching mommies know which show I'm referring to?) Next dilemma: finding time to create them all. Ha! 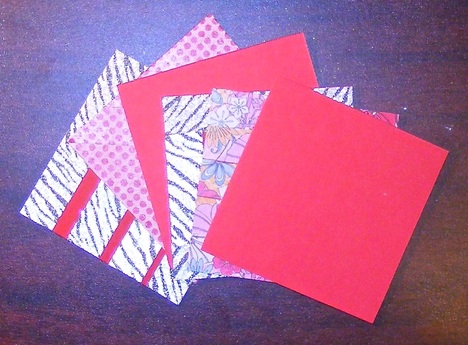
SO, in a nutshell, there are a plethora of thrifty and economical ways to use up the bits and pieces you've got piling up, instead of throwing them out. What other ideas can you think of? Try them out! See what you think!
| AlisonThe girl with a dream to create a place that's fun, vibrant interesting. ArchivesMay 2014 CategoriesAll 
My Inspiration |


 RSS Feed